Pisces Red Velvet Cake
Highlighted under: Everyday Dessert Recipes
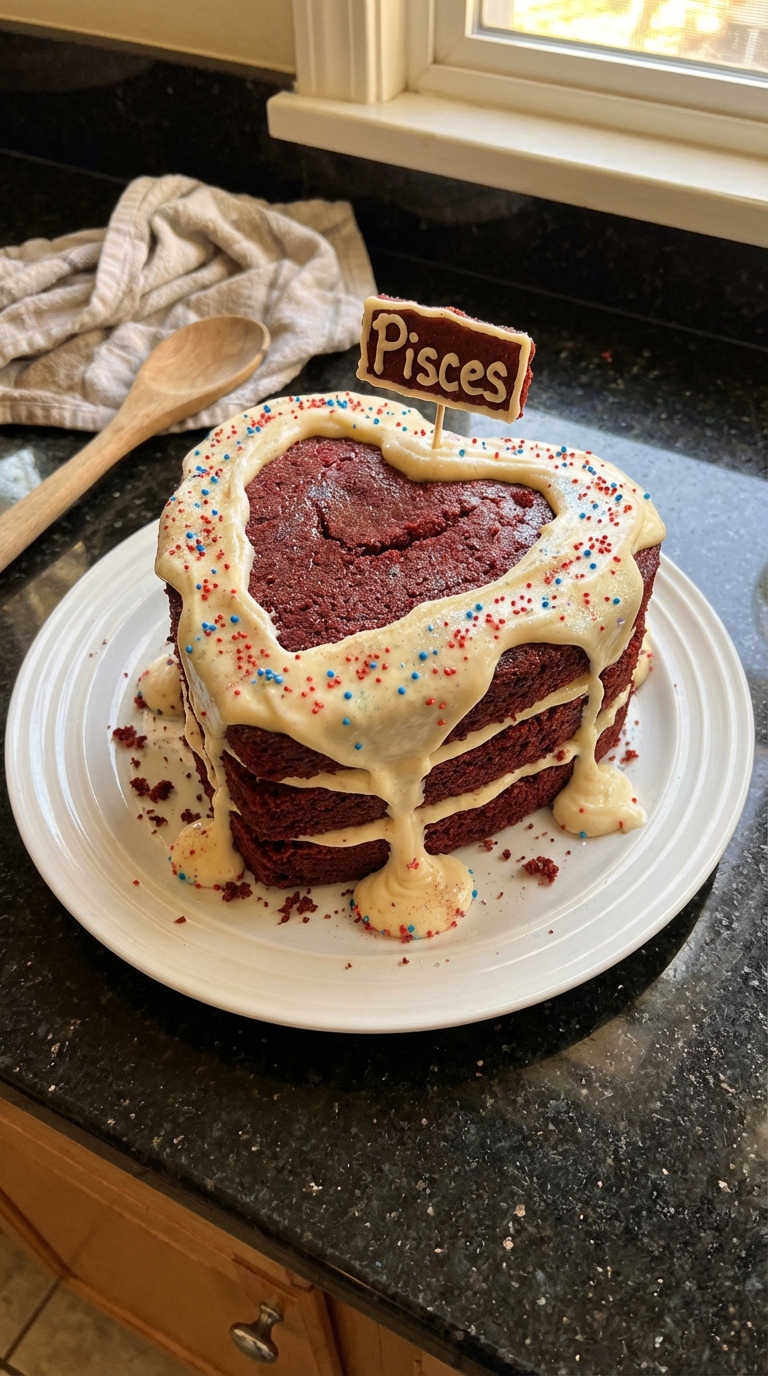
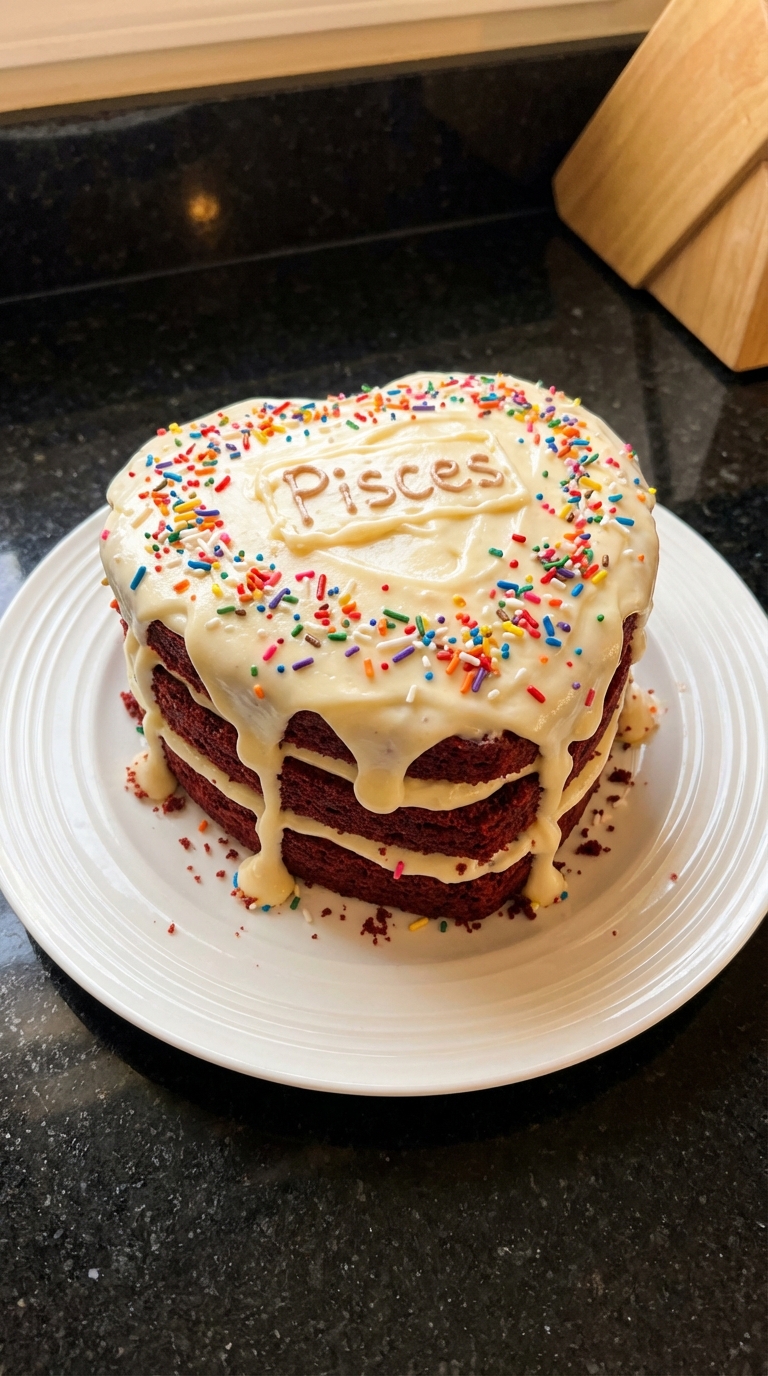
I love making this Pisces Red Velvet Cake because it not only tastes divine but also brings a touch of magic to any occasion. With its rich, velvety texture and eye-catching color, this cake is sure to impress. I always find that the combination of cocoa powder and buttermilk gives the cake its signature tenderness, while the cream cheese frosting adds the perfect creamy finish. Whether for a birthday celebration or just a sweet treat, this cake never fails to delight those who try it.
When I first set out to perfect my Red Velvet Cake recipe, I played around with the ingredients until I found the right balance. I discovered that using buttermilk adds just the right amount of acidity, which enhances the flavor without overpowering the cocoa. It's amazing to see how such a simple ingredient can make a significant difference in the final product.
Over the years, I’ve refined my frosting technique, ensuring that the cream cheese is at room temperature for the smoothest result. This little tip has transformed my cakes from good to extraordinary, providing an irresistible creamy contrast to the moisture of the cake itself.
Why You'll Love This Recipe
- Decadent flavor with a hint of cocoa and sweetness
- Show-stopping color that adds fun to any dessert table
- Creamy cream cheese frosting that's utterly addictive
The Role of Ingredients
Each ingredient in the Pisces Red Velvet Cake plays a crucial role in achieving the desired texture and flavor. For example, buttermilk not only adds moisture but also reacts with the baking soda to create a tender crumb. If you don't have buttermilk on hand, you can make a substitute by mixing one cup of milk with one tablespoon of vinegar or lemon juice; let it sit for about five minutes before using.
Cocoa powder brings an earthy depth to the cake, balancing the sweetness from the sugar. Using unsweetened cocoa powder allows you to control the cake's sweetness effectively. Avoid using Dutch-processed cocoa, as it may not react properly with the other leavening agents, resulting in a denser cake. To elevate the flavor even further, consider adding a pinch of espresso powder to enhance the chocolate notes.
Perfecting Your Frosting
The cream cheese frosting is the crowning glory of this cake, providing a refreshing tang that perfectly complements the sweetness of the red velvet layers. When beating the cream cheese and butter, ensure both are at room temperature; this allows for a smooth, lump-free consistency. If your frosting is grainy, you may need to continue mixing until it becomes glossy and well blended.
For quiet gatherings, a slight tweak to the frosting can add a creative twist. Adding a tablespoon of lemon juice or zest to the frosting brings an extra layer of flavor without overpowering the cake. Additionally, if you prefer a lighter frosting, try substituting half of the cream cheese with whipped heavy cream, which results in a fluffier texture.
Storage and Make-Ahead Tips
If you're preparing this cake ahead of time, both the cake layers and the cream cheese frosting can be made in advance. Wrapped tightly, the unfrosted cake layers can be stored at room temperature for up to two days or frozen for up to three months. Just ensure they are completely cooled before wrapping to prevent sogginess or freezer burn.
Once frosted, the cake can be stored in the refrigerator for up to five days. I recommend slicing the cake before storing, as it allows the frosting and cake to maintain their texture without becoming too dry. If you'd like to serve it later, let it come to room temperature for at least 30 minutes before eating, as it enhances the flavor profile.
Ingredients
For the Cake
- 2 cups all-purpose flour
- 1 ½ cups granulated sugar
- 1 teaspoon baking soda
- 1 teaspoon salt
- 1 teaspoon cocoa powder
- 1 cup vegetable oil
- 1 cup buttermilk, room temperature
- 2 large eggs, room temperature
- 2 tablespoons red food coloring
- 1 teaspoon vanilla extract
- 1 teaspoon white vinegar
For the Cream Cheese Frosting
- 8 ounces cream cheese, softened
- ½ cup unsalted butter, softened
- 4 cups powdered sugar
- 1 teaspoon vanilla extract
- 1 tablespoon milk (if needed)
Instructions
Prepare the Cake Batter
Preheat your oven to 350°F (175°C) and grease two 9-inch round cake pans. In a large bowl, mix the flour, sugar, baking soda, salt, and cocoa powder. In another bowl, whisk together the oil, buttermilk, eggs, food coloring, vanilla, and vinegar until combined. Gradually add the wet ingredients to the dry ingredients and mix until smooth.
Bake the Cakes
Divide the batter evenly between the prepared cake pans and smooth the tops. Bake for 25-30 minutes, or until a toothpick inserted into the center comes out clean. Let the cakes cool in the pans for 10 minutes before transferring them to wire racks to cool completely.
Prepare the Frosting
In a medium bowl, beat the softened cream cheese and butter together until creamy. Gradually add the powdered sugar and vanilla until smooth and fluffy. If the frosting is too thick, add a tablespoon of milk to reach your desired consistency.
Assemble the Cake
Once the cakes have cooled completely, place one layer on a serving plate. Spread a generous amount of cream cheese frosting on top, then place the second cake layer on top. Frost the sides and top of the cake with the remaining frosting. Decorate as desired.
Pro Tips
- For an extra touch, you can add a layer of crushed walnuts or pecans in between the cake layers for added texture and flavor.
Serving Suggestions
This cake makes a delightful centerpiece for any festive occasion, but it can also be paired beautifully with various accompaniments. Consider serving it alongside a scoop of vanilla ice cream or a dollop of fresh whipped cream to balance its rich flavor. For an extra touch of elegance, dust the cake with edible glitter or cocoa powder before presenting it.
For a unique twist, serve slices of the cake with a berry compote. The tartness of the berries contrasts nicely with the sweet cream cheese frosting. Prepare the compote by cooking mixed berries with a bit of sugar and lemon juice until they break down into a sauce. This will elevate your dessert experience and impress your guests.
Troubleshooting Common Issues
One common issue with red velvet cakes is the color fading during baking. To ensure the vibrant red hue stays prominent, use high-quality gel food coloring. Be cautious not to overbake the cake, which can contribute to a dry texture. Always check for doneness by inserting a toothpick into the center; it should come out clean or with a few moist crumbs.
If you find that your cake layers domed excessively during baking, it may be a sign of overmixing the batter or using too much flour. To avoid this, gently fold the wet ingredients into the dry until just combined. If the layers seem uneven, you can use a serrated knife to level the tops before frosting, creating a smooth, professional finish.
Questions About Recipes
→ Can I make this cake ahead of time?
Yes, you can bake the cakes a day in advance. Just wrap them tightly in plastic wrap and store them at room temperature. Frost just before serving.
→ What can I substitute for buttermilk?
You can make buttermilk by mixing 1 cup of milk with 1 tablespoon of vinegar or lemon juice, letting it sit for 5 minutes before using.
→ How should I store leftovers?
Store any leftover cake in the refrigerator in an airtight container. It will keep for up to 5 days.
→ Can I freeze this cake?
Absolutely! You can freeze the unfrosted layers separately, wrapped well in plastic. Allow them to thaw completely before frosting.
Pisces Red Velvet Cake
Created by: The Tastyspectrum Team
Recipe Type: Everyday Dessert Recipes
Skill Level: Intermediate
Final Quantity: 8 servings
What You'll Need
For the Cake
- 2 cups all-purpose flour
- 1 ½ cups granulated sugar
- 1 teaspoon baking soda
- 1 teaspoon salt
- 1 teaspoon cocoa powder
- 1 cup vegetable oil
- 1 cup buttermilk, room temperature
- 2 large eggs, room temperature
- 2 tablespoons red food coloring
- 1 teaspoon vanilla extract
- 1 teaspoon white vinegar
For the Cream Cheese Frosting
- 8 ounces cream cheese, softened
- ½ cup unsalted butter, softened
- 4 cups powdered sugar
- 1 teaspoon vanilla extract
- 1 tablespoon milk (if needed)
How-To Steps
Preheat your oven to 350°F (175°C) and grease two 9-inch round cake pans. In a large bowl, mix the flour, sugar, baking soda, salt, and cocoa powder. In another bowl, whisk together the oil, buttermilk, eggs, food coloring, vanilla, and vinegar until combined. Gradually add the wet ingredients to the dry ingredients and mix until smooth.
Divide the batter evenly between the prepared cake pans and smooth the tops. Bake for 25-30 minutes, or until a toothpick inserted into the center comes out clean. Let the cakes cool in the pans for 10 minutes before transferring them to wire racks to cool completely.
In a medium bowl, beat the softened cream cheese and butter together until creamy. Gradually add the powdered sugar and vanilla until smooth and fluffy. If the frosting is too thick, add a tablespoon of milk to reach your desired consistency.
Once the cakes have cooled completely, place one layer on a serving plate. Spread a generous amount of cream cheese frosting on top, then place the second cake layer on top. Frost the sides and top of the cake with the remaining frosting. Decorate as desired.
Extra Tips
- For an extra touch, you can add a layer of crushed walnuts or pecans in between the cake layers for added texture and flavor.
Nutritional Breakdown (Per Serving)
- Calories: 380 kcal
- Total Fat: 26g
- Saturated Fat: 15g
- Cholesterol: 195mg
- Sodium: 85mg
- Total Carbohydrates: 32g
- Dietary Fiber: 3g
- Sugars: 24g
- Protein: 6g