Marbled Vanilla Chocolate Cake
Highlighted under: Everyday Dessert Recipes
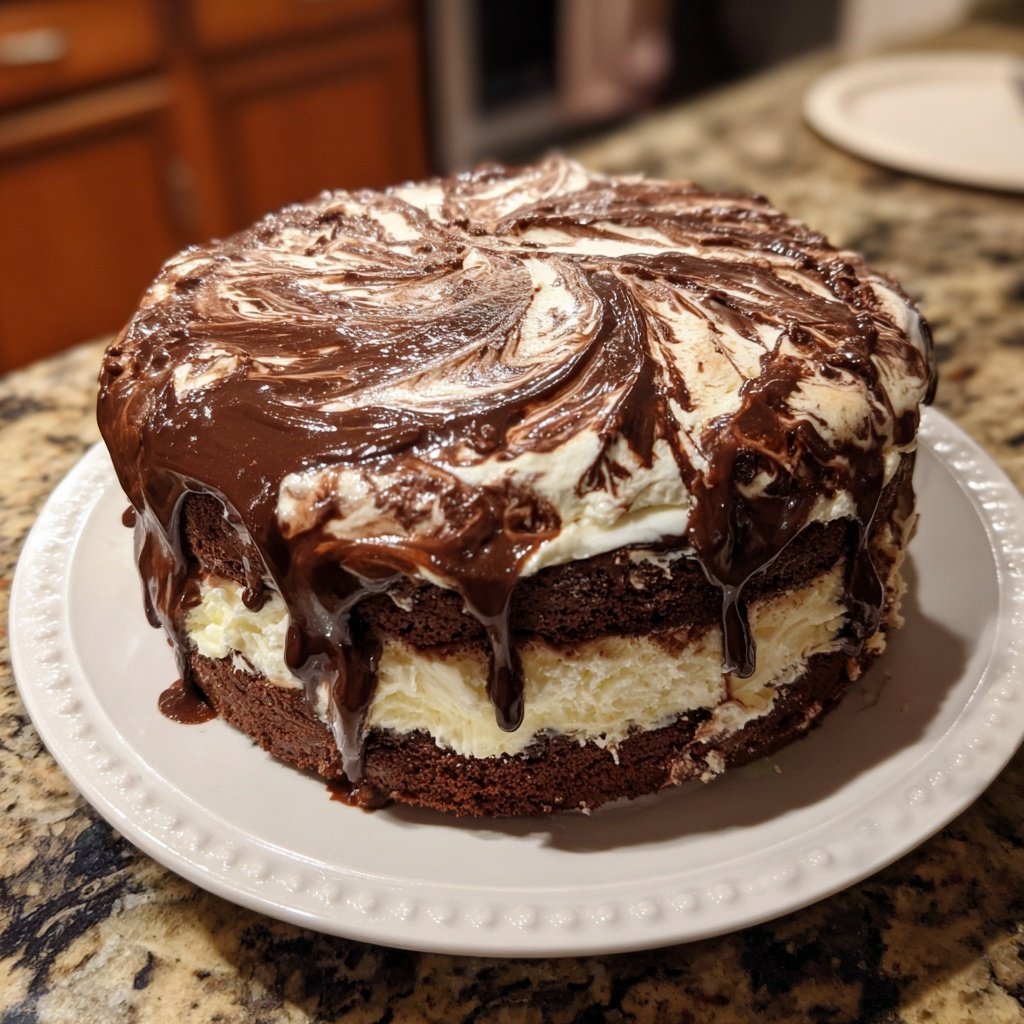
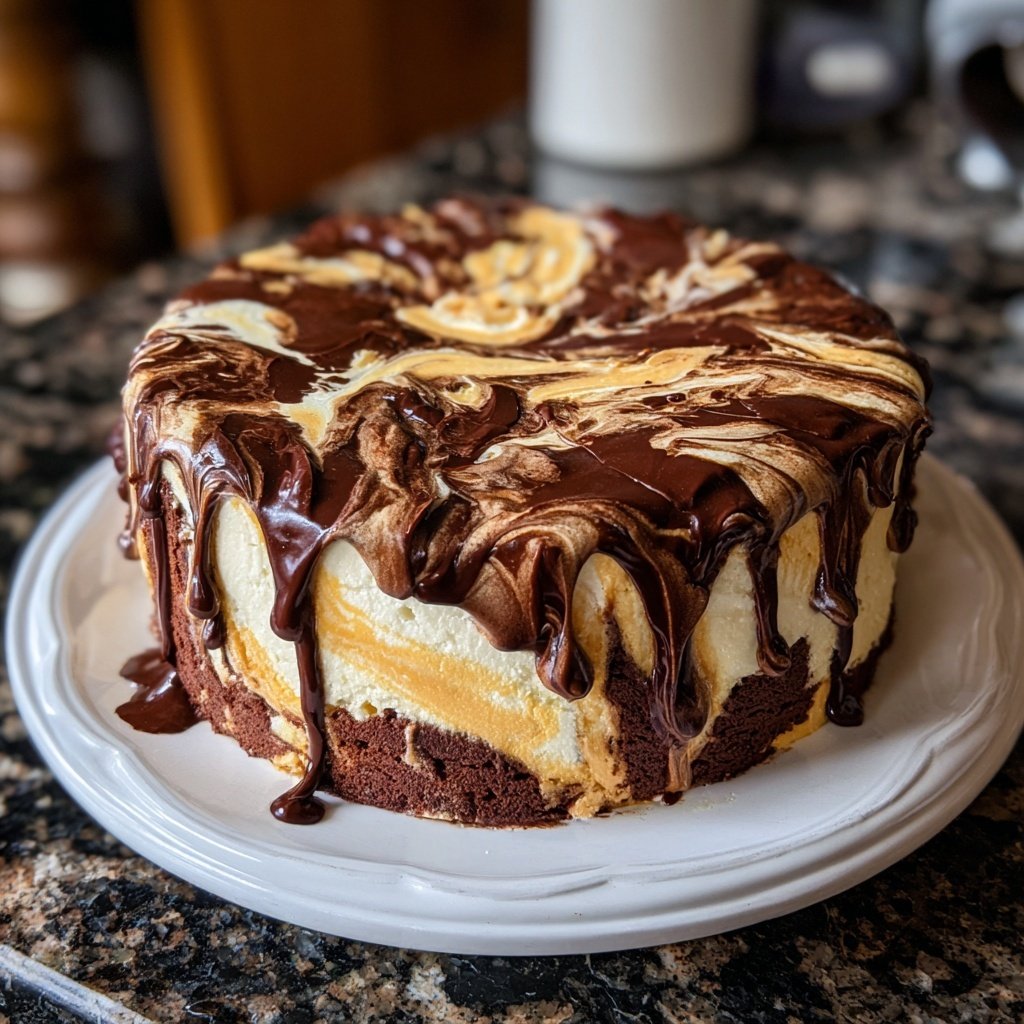
When I first attempted making a marbled cake, I was captivated by the delicate dance of chocolate and vanilla swirling together. The visual appeal is just the beginning; this cake is a delightful treat that brings together two classic flavors. I learned that the secret to achieving those beautiful swirls is to pour the batters alternately and then use a knife to create a gentle marble effect. The result is a visually stunning dessert that never fails to impress during family gatherings or casual afternoon teas.
My journey into baking began with a simple desire to create something beautiful and delicious. The first time I made this marbled vanilla chocolate cake, my kitchen was filled with the sweet aroma of freshly baked cake. The joy I felt when slicing into it and revealing the stunning marbled pattern was unparalleled. Each slice invited comments of awe and anticipation.
One tip I discovered along the way is to use room temperature ingredients for the best texture. This cake is a fantastic addition to any celebration, and the balance of chocolate and vanilla flavors will leave your guests asking for seconds. I hope you enjoy making it as much as I did!
Why You'll Love This Cake
- The perfect blend of rich chocolate and delicate vanilla flavors
- Lusciously moist texture that stays fresh for days
- Eye-catching swirls that impress at any gathering
Understanding the Textures
Achieving the perfect texture in your Marbled Vanilla Chocolate Cake relies heavily on the balance of wet and dry ingredients. The creaming method, where the butter and sugar are whipped together until light and fluffy, introduces essential air into the batter, promoting a tender crumb. Make sure your butter is at room temperature for optimal incorporation, which generally takes about 3-5 minutes using an electric mixer on medium speed.
Moreover, the whole milk adds moisture, while the flour provides structure. If you're looking for a lighter version, consider substituting half the butter with applesauce or Greek yogurt. This swap can enhance moisture without sacrificing flavor, although it may slightly alter the cake's density.
Perfecting Your Marble Swirls
The marbling technique is an art form in itself. When spooning the batters into the pans, alternating between vanilla and chocolate every few dollops creates a beautiful pattern. Using a knife or a skewer, gently swirl through the batters without overdoing it to avoid muddying the colors. A good rule of thumb is to swirl just 3-4 times; you want distinct layers while still achieving that beautiful marbled look.
For a more pronounced marbling effect, you can experiment with the ratios of batters. Try using one-third chocolate to two-thirds vanilla for a lighter cake with hints of chocolate flavor, or vice versa for a richer chocolate experience. This allows you to customize the flavor intensity based on your preference.
Storing and Serving Tips
This Marbled Vanilla Chocolate Cake maintains its freshness for several days when properly stored. Once completely cooled, wrap each layer in plastic wrap and then place them in an airtight container. This preserves moisture and prevents the cake from drying out. For longer storage, consider freezing the layers individually; they can last up to three months. Just thaw at room temperature before frosting or serving.
For serving, consider pairing the cake with a simple vanilla glaze or a dollop of whipped cream to highlight its flavors without overwhelming them. You can also sprinkle some chocolate shavings on top for an elegant touch. If you're feeling adventurous, experimenting with flavor-infused syrups like raspberry or espresso drizzled over each slice can elevate this classic dessert.
Ingredients
For the Cake
- 2 cups all-purpose flour
- 1 ½ cups granulated sugar
- 1 cup unsalted butter, softened
- 4 large eggs
- 1 cup whole milk
- 1 tablespoon baking powder
- 1 teaspoon vanilla extract
- ½ cup unsweetened cocoa powder
- 1 teaspoon salt
Mix all ingredients thoroughly for the best results!
Instructions
Preheat the oven
Preheat your oven to 350°F (175°C) and grease two 9-inch round cake pans.
Prepare the batter
In a large bowl, cream together the butter and sugar until light and fluffy. Add eggs one at a time, mixing well after each addition. Stir in vanilla extract.
Combine dry ingredients
In another bowl, whisk together flour, baking powder, and salt.
Mix together wet and dry ingredients
Gradually add the dry ingredients to the butter mixture, alternating with milk, and mix until smooth.
Divide the batter
Take half of the batter and place it in a separate bowl. Add cocoa powder to this half and mix until well combined.
Marble the batters
In the prepared pans, spoon alternating dollops of the vanilla and chocolate batters. Use a knife to gently swirl the batters together to create a marbled effect.
Bake the cakes
Bake in the preheated oven for about 30 minutes, or until a toothpick inserted in the center comes out clean.
Cool and serve
Allow the cakes to cool in the pans for 10 minutes before transferring them to wire racks to cool completely.
Enjoy your homemade marbled cake!
Pro Tips
- For an even richer flavor, consider adding a teaspoon of espresso powder to the chocolate batter!
Ingredient Substitutions
If you need to make this cake dairy-free, replace the butter with coconut oil or a plant-based butter substitute, and use almond milk or any non-dairy milk in place of whole milk. This still yields a moist cake without sacrificing flavor. Additionally, for a gluten-free version, substitute the all-purpose flour with a gluten-free blend—just be sure it includes xanthan gum for structure.
For those who prefer less sugar, you might consider using a natural sweetener such as honey or maple syrup. However, keep in mind that this will alter the moisture level, so you may want to reduce the amount of milk used.
Troubleshooting Common Issues
If your cake domes excessively during baking, it could be due to an oven temperature that’s too high. Use an oven thermometer to ensure you’re baking at the correct 350°F (175°C). You can also reduce the temperature slightly and extend the baking time to allow the cake to rise more evenly.
Should your cake stick to the pan, ensure you grease thoroughly or consider using parchment paper rounds at the bottom of the pans. This guarantees easy removal after cooling. If you accidentally underbaked, simply cover the cake with foil and return it to the oven for an additional 5-10 minutes until a toothpick comes out clean.
Questions About Recipes
→ Can I make this cake in advance?
Yes, the cake can be baked a day ahead and stored tightly covered at room temperature.
→ How can I store leftovers?
Store any leftover cake in an airtight container at room temperature for up to three days.
→ Can I freeze the cake?
Absolutely! Wrap slices in plastic wrap and store in an airtight container for up to three months.
→ What can I use instead of eggs?
You can substitute each egg with 1/4 cup of unsweetened applesauce or a commercial egg replacer.
Marbled Vanilla Chocolate Cake
Created by: The Tastyspectrum Team
Recipe Type: Everyday Dessert Recipes
Skill Level: Intermediate
Final Quantity: 8 servings
What You'll Need
For the Cake
- 2 cups all-purpose flour
- 1 ½ cups granulated sugar
- 1 cup unsalted butter, softened
- 4 large eggs
- 1 cup whole milk
- 1 tablespoon baking powder
- 1 teaspoon vanilla extract
- ½ cup unsweetened cocoa powder
- 1 teaspoon salt
How-To Steps
Preheat your oven to 350°F (175°C) and grease two 9-inch round cake pans.
In a large bowl, cream together the butter and sugar until light and fluffy. Add eggs one at a time, mixing well after each addition. Stir in vanilla extract.
In another bowl, whisk together flour, baking powder, and salt.
Gradually add the dry ingredients to the butter mixture, alternating with milk, and mix until smooth.
Take half of the batter and place it in a separate bowl. Add cocoa powder to this half and mix until well combined.
In the prepared pans, spoon alternating dollops of the vanilla and chocolate batters. Use a knife to gently swirl the batters together to create a marbled effect.
Bake in the preheated oven for about 30 minutes, or until a toothpick inserted in the center comes out clean.
Allow the cakes to cool in the pans for 10 minutes before transferring them to wire racks to cool completely.
Extra Tips
- For an even richer flavor, consider adding a teaspoon of espresso powder to the chocolate batter!
Nutritional Breakdown (Per Serving)
- Calories: 380 kcal
- Total Fat: 26g
- Saturated Fat: 15g
- Cholesterol: 195mg
- Sodium: 85mg
- Total Carbohydrates: 32g
- Dietary Fiber: 3g
- Sugars: 24g
- Protein: 6g